Subway Art Tutorial with pdf
>> Sunday, April 25, 2010
 Step by step instructions @ tatertotsandjello.blogspot.com

Step by step instructions @ tatertotsandjello.blogspot.com
 Step by step instructions @ tatertotsandjello.blogspot.com
 Or be creative and come up with a new idea when using this basic tutorial!
Read more...
Or be creative and come up with a new idea when using this basic tutorial!
Read more...
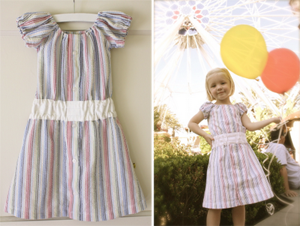
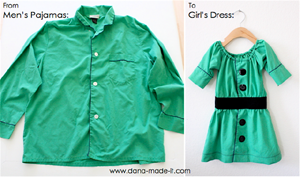

 Step by step instructions @ www.dana-made-it.com
 Step by step instructions @ projectsforyournest.blogspot.com
 Step by step instructions @ tearosehome.blogspot.com
 Step by step instructions with pictures @ madebythemamamonster.blogspot.com
 Step by step instructions @ www.instructables.com
This fabric "high chair" is perfect for away from home dining.
It's no 5-point harness, but it helps secure them in the chair.
This one was made from an old thrifted, quilted ottoman cover
Gather materials: Quilted fabric* for outer, cotton broadcloth or similar for lining, Velcro. *Batting combined with broadcloth can also be used
For this one, I used a thrifted bedspread and bedsheet
Step 1 -
Make pattern pieces
All measurements include 3/8" seam allowance
Step 2 - Add markings 2 1/4" apart at center of each piece as shown in picture.
These markings will help you place the connector piece.
Step 3 - Using a single layer of lining and a single layer of quilted fabric, cut each piece out together.
Curve the corners of velcro pieces so there are no sharp points
Step 4 - With right sides together, sew connector pieces together along long edges.
(3/8" seam allowance)
Step 5 - With right sides together, sew seat pieces together, starting at connector mark and ending at next mark, leaving open 2 1/4".
Step 6 - With right sides together, sew strap pieces together, starting at connector mark and ending at next mark, leaving open 2 1/4".
Step 7 -
Turn all pieces right side out and press.
Step 8 - Top stitch connector piece 1/4" from edge along sewn edges.
Step 9 - Insert connector piece into opening in seat and into opening in strap. Pin into place.
Step 10 - 1/4" Top stitch around entire edge of seat and strap, making sure to catch connector piece.
Step 11 - Hand stitch lip edge of strap and seat at connector for a more finished look.
or use 1/8" top stitch to secure lip.
Step 12 - Sew Velcro onto ends of waist strap, centering on strap & placing it 1 1/4" away from short edge.
Scratchy side goes on outside of strap
Soft side goes on inside of strap.
Sew all along the edge.
You're done!
This has got to be one of the fastest projects I’ve ever done. And this time, I made it for myself. Well, for my daughter when she was born; however, since babies don’t know what they’re wearing, it was truly for me.
In short, the instructions go like this: cut a front and back of a hat from the bottom portion of a t-shirt and sew them together.
For those who need more details than that, here’s the tutorial.
1. Select an appropriate shirt. (This one is going to be too tight for me for longer than I care to think about.)
2. Fold shirt in half length-wise to save cutting time. If your scissors are poor, you might not be able to do this. Outline half of a bunny-rabbit head shape along the fold. The bottom hem will become the hem of your hat. You want the hem to be about 7″ wide, so 3.5″ from the fold ought to do it.
3. Cut along the line you’ve drawn and see what you’ve got. This is the front and back of your hat.
4. Pin the right sides together and sew. Perfect symmetry is not critical because you will be tying the rabbit ears into a knot.
5. After sewing, turn right side out and you are done! For a super-cute gift, make a matching pair of pants out of the sleeves of the same shirt. (Tutorial coming another day ) And, of course, a little zig-zag stitch along the bottom would be a nice touch.
I used this weird stuffed lozenge to fit the hat before the baby came.
If you make this hat, please post to flickr with a tag for rookiemoms! We want to see your stuff.
And finally, I had the opportunity to put the hat on a real baby’s head.
Make easy kids pants out of old t-shirt, no heming needed!


© Blogger template Webnolia by Ourblogtemplates.com 2009
Back to TOP


