
Sew a quick newborn hat — from a t-shirt
>> Saturday, April 24, 2010
This has got to be one of the fastest projects I’ve ever done. And this time, I made it for myself. Well, for my daughter when she was born; however, since babies don’t know what they’re wearing, it was truly for me.
In short, the instructions go like this: cut a front and back of a hat from the bottom portion of a t-shirt and sew them together.
For those who need more details than that, here’s the tutorial.
1. Select an appropriate shirt. (This one is going to be too tight for me for longer than I care to think about.)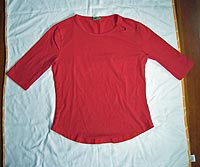
2. Fold shirt in half length-wise to save cutting time. If your scissors are poor, you might not be able to do this. Outline half of a bunny-rabbit head shape along the fold. The bottom hem will become the hem of your hat. You want the hem to be about 7″ wide, so 3.5″ from the fold ought to do it.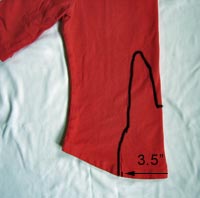
3. Cut along the line you’ve drawn and see what you’ve got. This is the front and back of your hat.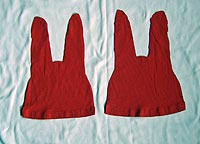
4. Pin the right sides together and sew. Perfect symmetry is not critical because you will be tying the rabbit ears into a knot.
5. After sewing, turn right side out and you are done! For a super-cute gift, make a matching pair of pants out of the sleeves of the same shirt. (Tutorial coming another day ) And, of course, a little zig-zag stitch along the bottom would be a nice touch.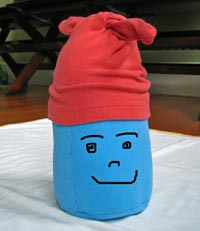
I used this weird stuffed lozenge to fit the hat before the baby came.
If you make this hat, please post to flickr with a tag for rookiemoms! We want to see your stuff.
And finally, I had the opportunity to put the hat on a real baby’s head.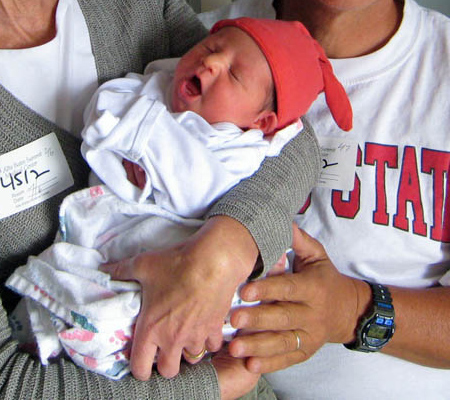


0 comments:
Post a Comment